What to Include In Your Ultimate Home Workshop
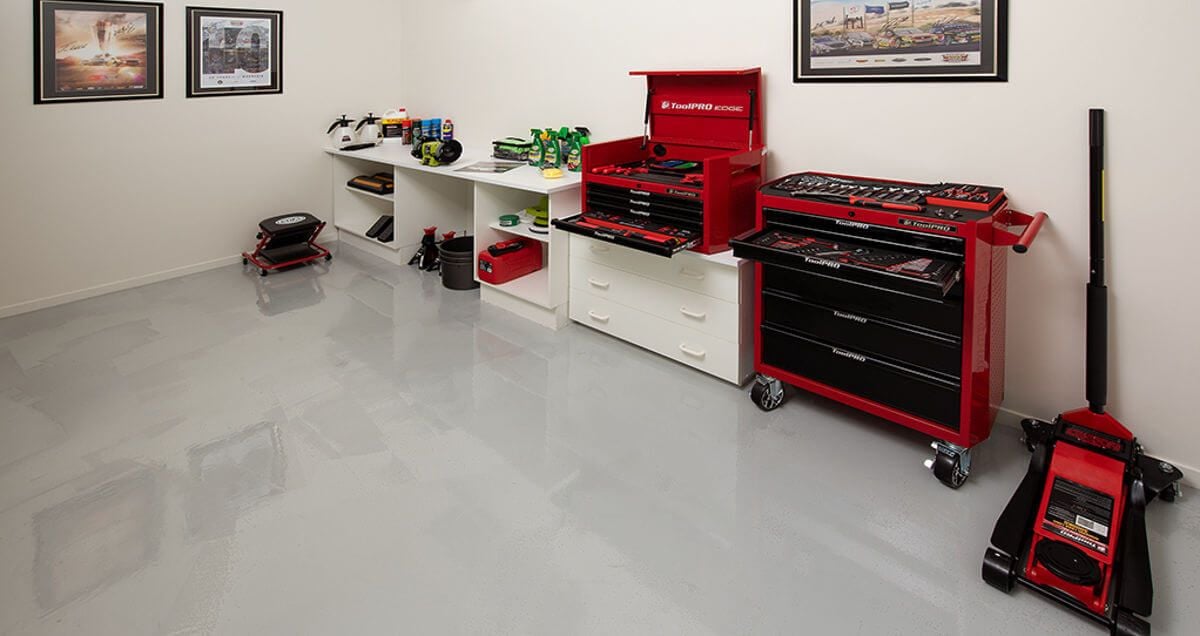
If you’re lucky enough to win our Christmas Prize Home on the Sunshine Coast, your workshop will be well underway with a whole bunch of tools from Supercheap Auto. If not, you’re going to have to do it yourself. But who doesn’t love a bit if DIY anyway?
Obviously, what you include in your workshop all depends on what sort of work you’re going to be doing. The requirements for a woodworking shop are quite different to a home car workshop. Whatever kind of tinkering you like to do, we’ve put together a basic list of essentials and a few ‘nice-to-haves’ to help you put together the ultimate list for your place.
-
-
Workbench
Building your workbench could be your first project. While it’s a bit of a chicken or egg situation – i.e. it would be nice to be all set up before you start – there’s also no time like the present to get started and put those tools into action.
It doesn’t have to be anything too fancy – just solid, stable and preferably flat. A timber top is a good idea so that if you’re sawing on top of it and go through to the surface you’ll just leave a saw mark rather than blunting your saw blade on metal. In the long run, a bit of wear and tear will give it character anyway. Plus, you want it to look like you’ve actually used it.
-
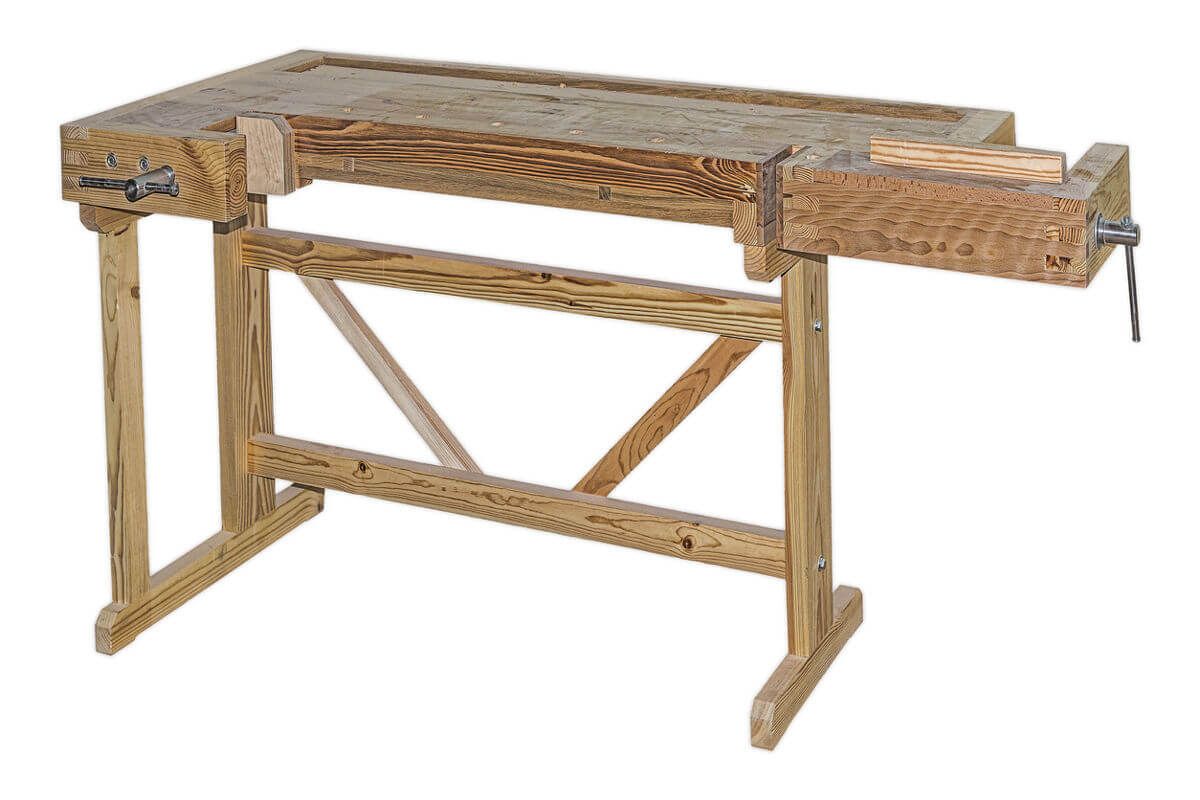
This is the sort of thing you could whip up for your workbench.
-
Tool Storage
Anyone who’s spent an excruciating hour searching through the mess for a tool that you thought was ‘right there’, understands the importance of having an organised workshop. And the secret to being organised? One word. Storage.
There really is no such thing as having too much storage.
Setting up some shelves with storage boxes and/or crates is one of the simplest, cheapest and most effective solutions. For the shelves, you can pick up some easy-to-assemble metal units from somewhere like Supercheap, or you could DIY with some recycled 4 by 2 and plywood shelves.
It’s also worth including a classic peg board behind your workbench to hook up your tools. There’s a reason this is a classic – it’s quick and easy to set up and perfect for being able to see your most used tools at a glance. If you’re ultra-organised (and dare we say slightly obsessive) you can even add labels to the board behind the tools so everything gets returned to the correct spot.
Another storage hack is to include a magnetic strip on the wall (you know like the ones they have for storing knives in kitchens) as a place to neatly keep some of the basic tools you use all the time.
Before we move on, we do have one sage piece of advice: It’s not enough to have the perfect storage for all of your tools. You also have to put them back.

The humble pegboard is perfect for organising tools.
-
-
Hand Tools
This category includes all of those tools that you just ‘need’ including screwdrivers, hammers, chisels, spanners, wrenches, sockets, and the list goes on.
For those just starting out, places like Supercheap and Bunnings sell tool sets that cover most of the basics in handy carry cases that keep everything organised. Bonus.
-
The Sawing Basics
There are quite a few options in this category from hand saws to table saws and everything in between. But to keep it simple, the main saws to have in your kit include a handsaw (your go-to for basic carpentry), a hacksaw (perfect for cutting metals and plastics), and, in the power tool category, a jigsaw (for cutting around curves) and a circular saw (for powerful cutting through thick timber). With this batch you’ll be able to get most of your woodworking and basic home reno jobs done.
To add to these, the ‘nice-to-haves’ would include:
- a miter saw or drop saw (which makes short work of cutting angles or lengths of timber); and
- a table saw (which is pretty much the bees knees for woodworking). With this tool you’ll be able to rip down timber, miter, bevel and crosscut. You’ll need to allow plenty of room to have this one in your shop so that you have the space needed to guide long lengths of timber through the saw.

If you’re thinking about doing some home renos, a circular saw is an essential.
-
Sanders
This is where things can get complicated. With so many different sanders out there and so many different sanding needs, it can leave you wondering where on earth to start.
Belt sanders are great at chewing through timber so perfect for if you need to ‘dress’ rough sawn timber or strip back weathered timber.
Then there are orbital sanders which are designed for general sanding jobs (like sanding between coats of paint or finishing and getting that smooth finish you’re looking for. These sanders vibrate in a very small oval shaped motion (hence the ‘orbit’ part of the name). This type of sander only takes off a small amount of timber at a time so it can take a while to sand a big piece, but the end result will be well worth it.
Finishing sanders, some of which cross-over into the orbital category, are designed to do the fine finishing work that will give you that ultra-smooth finish. They are generally smaller, light-weight and good at sanding along edges for a perfect finish. For those infuriating little nooks and crannies, a detail sander is what you need to get the job done and save your sanity.
-

An orbital sander is an essential for your kit.
-
Drills
No workshop would be complete without a power drill or two, and generally at least one of them should be cordless. There are two main types of drill – one is the hammer drill which is for drilling into masonry or bricks, while a driver is good for drilling holes and driving screws into timber metal or plastic.
If you have to choose only one, go for a driver and put the hammer drill on your wish list for Christmas.
-
Power
This might seem a bit obvious, but before you check this one off the list make sure you think about whether you really do have the power you need to work efficiently and safely.
You might have a couple of powerpoints in your designated workspace but are they in the right locations for where you will be working? And do you have enough?
What you don’t want are powerboards piggybacking off other powerboards all loaded up with a tangle of cords running to, you guessed it, high powered cutting machines. What could go wrong? Scarily this happens all too often in home workshops but it’s a recipe for disaster.
What you do want is enough powerpoints to plug in the key tools you’ll be using most often. Ideally, they should be positioned high above your workbench as it’s much safer to have the point and power cord above where you are working.
If you’re not sure your power set up is up to the task, get an electrician to rig up what you need. You’ll be glad you did.
-
Bar-fridge
Spending hours in the workshop can be thirsty work, so it’s important to have some cold beverages on hand to keep you cool and hydrated. While its questionable whether this item is a necessity or a nice-to-have, it’s definitely worth adding to your ultimate workshop list.
Other Things to Consider When Setting Up Your Workshop
If you don’t already have an obvious place for your workshop, there are a few things to consider when choosing the right spot.
While it depends on what you intend to be doing in your workshop – i.e. whether you’re going to be working on your car, or honing your woodworking skills, there are some common things you need to consider:
-
-
Location
This one might be easy if you only have one possible place for your workshop like the garage. But if you’re deciding between a couple of locations – like the garage vs the shed down the back – there are a few things to consider. If your workshop is straight off the house, it’s easy to duck in to do small jobs or grab tools when you need them. If it’s a bit further away like out the back in the shed, you may have more space for big projects (plus more of a chance to ‘escape’). On the other hand, grabbing that tool or making a quick repair might seem more of a hassle.
Even a small bench set up in a quiet corner and a few basic hand tools could be enough space to get you going.
-

You don’t need a lot of space to set up a basic workshop.
-
Noise
If your family isn’t as passionate about your hobbies as you are, chances are they might not want to listen to you clanging around day and night.
Even if you’ve opted for a spot that’s well away from the house, what about the neighbours? Chances are they might enjoy some peace and quiet too.
So, what are your options when it comes to limiting workshop noise? You can consider noise reducing methods such as using insulation or a commercially-available sound proofing material. Or, for the budget/DIY option, you can consider attaching carpet scraps or egg cartons to the walls. Scrambled eggs anyone?
Tip: If you don’t already know what your local council’s regulations are regarding when you are allowed to operate power tools, check their website for times. And before you fire up the sander on a Sunday morning, do check that your significant other is awake. You could even sweeten the deal with a cuppa.
-
Access
This might seem bleedingly obvious, but make sure you can easily access the space you choose. Needless to say, for a car workshop you’re going to need to be able to drive your vehicle inside, (no kidding, right?) but for a woodworking workshop, it’s just as important to ensure that you can get your tools and materials inside easily. For example, the shed out the back may not be such a good choice if you can’t drive down the side of your house to unload. However, if the space is just too good to pass up, there are ways to make it work like using a trolley or wheelbarrow to cart the heavy stuff.
-
Budget
If you’re on a tight (or virtually non-existent) budget, the best idea would be to keep an eye out for gear on Gumtree or Facebook Marketplace. Second hand tools crop up regularly and even timber workbenches can be picked up for a steal and sometimes even free. If you’re not already a Gumtree member, sign up and you can even set up searches for the key tools or pieces of equipment that you’re looking for and then Gumtree will send you a notification when something that may fit the bill is listed. Another option is to keep an eye out when your local roadside collection rolls around (if your council offers that service) and see if anyone else’s junk could become your treasure. After all, your set up doesn’t have to be pretty, just functional.
Tip: If woodworking is your thing, Gumtree is also a great place to source recycled timber and off-cuts and even beautiful natural edge timber slabs.
Win the Ultimate Workshop In The Ultimate Family Home
For your chance to win Endeavour Foundation’s Christmas Prize Home, complete with a dedicated workshop off the garage and tools from Supercheap, grab your ticket now.
You’ll find our Christmas Prize Home at 19 Ridgeview Place, Woombye, just up the road from The Big Pineapple. This amazing family home is waiting to be explored every day from 10am to 5pm until the lottery closes on Wednesday 11th of December.
How to Get There
From Brisbane: Head up the M1 north toward the Sunshine Coast then take exit 201 onto Nambour Connection Road. Take a left onto Woombye Palmwoods Road then follow the signs to Ridgeview Place.
From Gympie: Take the Bruce Highway (A1), which becomes the M1, all the way to Forest Glen. Take exit 201 and head west onto Nambour Connection Road. Veer left onto Woombye Palmwoods Road then follow the signs to Ridgeview Place.
Imagine What’s Possible.
When you purchase lottery tickets from Endeavour Foundation, you help to provide opportunities for people with an intellectual disability. Find out more about how Endeavour Foundation is helping people with disability to imagine what’s possible.
